When a client needs a different time, you can reschedule their booking directly from the dashboard. Rescheduling preserves all the original booking details — client info, service, notes — and simply moves it to the new slot. The client receives an updated confirmation.
How to reschedule
- 1
Open the booking
Click the booking in calendar or list view to open the detail panel. - 2
Click Reschedule
Click the Reschedule button in the detail panel. The reschedule modal opens.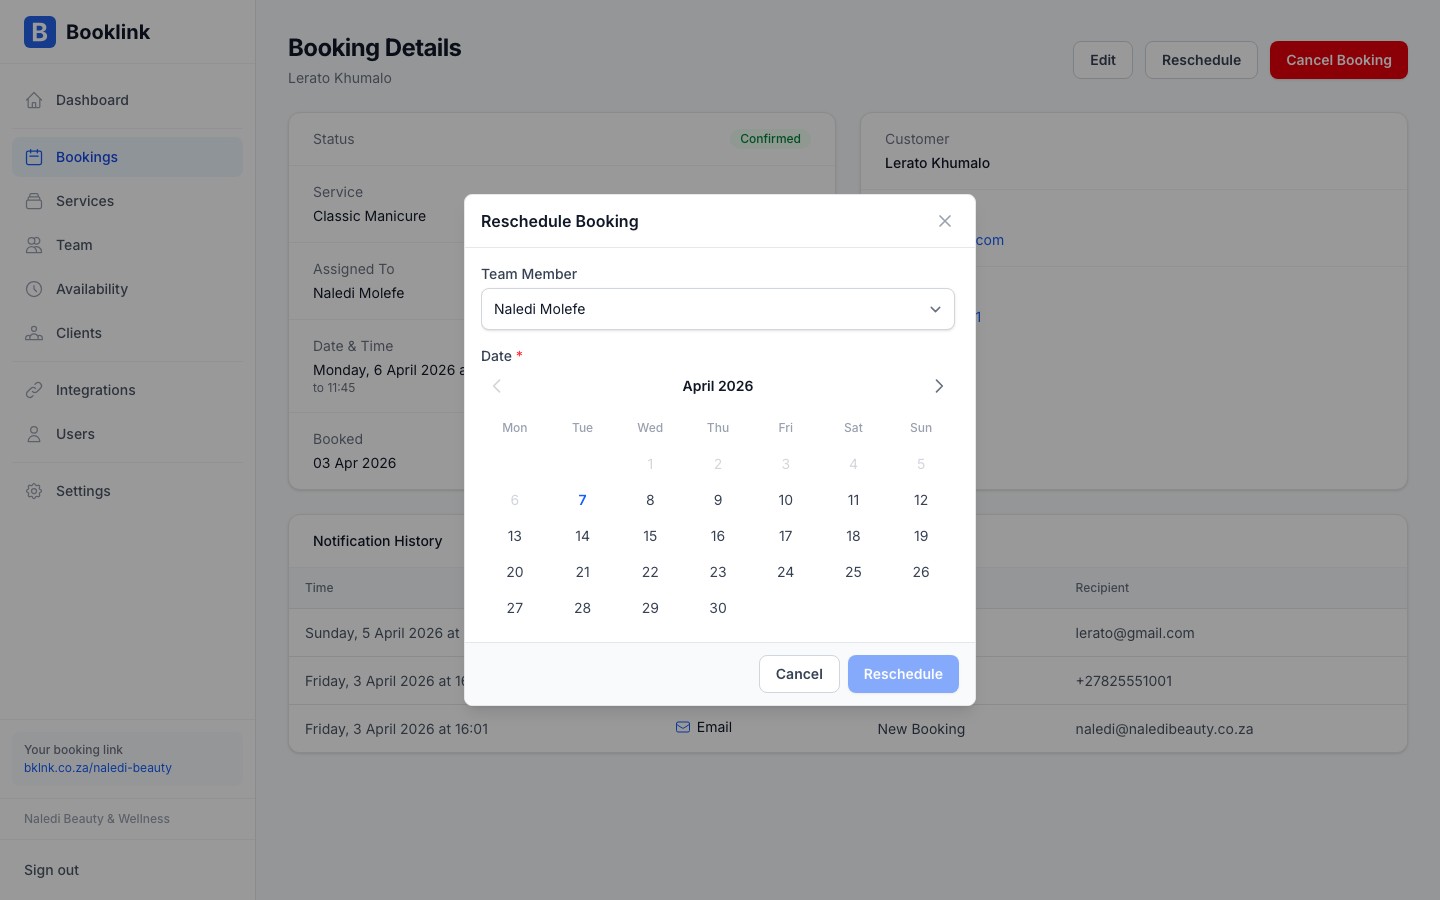
- 3
Select a new date
Use the date picker in the modal to choose the new appointment date. Only dates within your available schedule are selectable. - 4
Select a new time slot
Available time slots for the chosen date are shown. Click the slot that works for the client. Slots that are already taken by other bookings are greyed out. - 5
Confirm the reschedule
Click Confirm reschedule. The booking is updated to the new date and time. The client receives an updated confirmation email with the new details.
What changes and what stays the same
When you reschedule a booking:
- The date and time update to the new slot
- The booking status stays as Confirmed (pending bookings can also be rescheduled before confirming)
- All client details, service details, and notes remain unchanged
- The original booking payment status is preserved
Client self-reschedule
Clients can also reschedule themselves using the manage-my-booking link in their confirmation email. Their self-service reschedule works the same way and you will see the updated time reflected in your dashboard automatically.